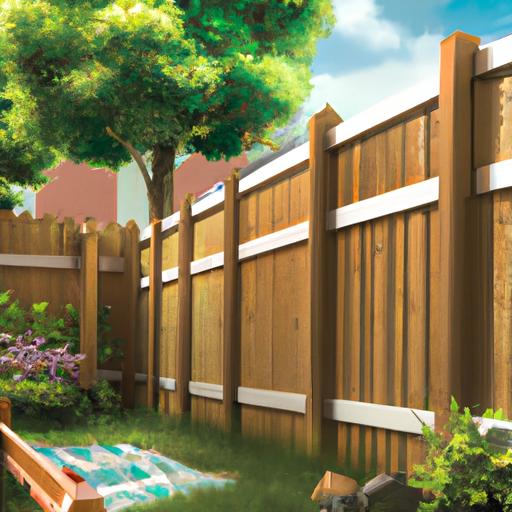
Painting a fence can be a daunting task, but with the right tools and preparation, it can be an incredibly rewarding experience.
If youre looking to spruce up your backyard and add a touch of color to your fencing, then this step-by-step guide will help you to paint your fence like a pro.
From gathering the right tools and preparing the fence, to applying primer and the first and second coats of paint, to finishing the job with a roller and taking care of your newly painted fence, this guide has you covered.
So get ready to get your hands dirty and enjoy the journey to a beautiful, freshly painted fence!
Short Answer
Painting a fence is a relatively easy job, but it will require some preparation and work.
Begin by power washing the fence to remove dirt, grime and mildew.
Once the fence is dry, use painters tape to cover any areas that you dont want to paint.
Then, apply a primer to the fence and let it dry.
Finally, use a quality exterior paint to finish the job.
Use a brush for intricate areas and a roller for the wide flat areas.
Allow the paint to dry before removing the painters tape.
Gather the Right Tools
Painting a fence is a great way to give your outdoor space a makeover and add a splash of colour to your garden.
But if you want the job done right, youll need to gather the right tools.
Before you start, make sure you have a paintbrush, sandpaper, paint tray, and a roller.
These tools will help you achieve a professional-looking finish.
The paintbrush is essential for applying primer and paint.
Youll need a good quality brush with synthetic bristles for the best results.
Sandpaper will help you to clean and smooth the fence before painting.
A paint tray is also necessary for holding the primer and paint.
Finally, the roller will give you an even and smooth finish that youll be proud to show off.
Once youve gathered your tools, youre ready to start painting.
With the right equipment, youll be able to transform your fence in no time!
Preparing the Fence

When it comes to painting a fence, preparation is key.
Before you even pick up a brush, youll need to make sure the fence is ready for painting.
This involves cleaning the surface and repairing any damage.
To do this, use a pressure washer to remove dirt and debris.
If there are any cracks or holes, fill them in with wood putty and let it dry.
Once the surface is clean and free of any damage, use sandpaper to smooth out the wood.
This will help the paint adhere better and give a professional-looking finish.
Once the surface is ready, you can start painting!
Applying Primer
Painting a fence is a great way to spruce up your outdoor space and add a touch of color to your yard.
Before getting started, youll need to make sure you have the right tools and materials, such as a paintbrush, sandpaper, paint tray and roller.
After gathering your supplies, the first step in the process is to apply a coat of primer.
When choosing a primer, be sure to select one that is specifically designed for outdoor use.
This will help ensure that the primer will adhere to the surface and protect the paint from fading or chipping.
Once youve chosen a primer, use sandpaper to clean and smooth the fence.
This will help the primer to adhere better and create a more even finish.
Once the fence has been sanded and prepped, youre ready to begin priming.
Start by dipping the brush into the primer and then brushing it onto the fence in an even, horizontal stroke.
Be sure to cover the entire surface, as any missed spots will be visible once the paint is applied.
After the primer has been applied, allow it to dry completely before moving on to the next step.
By following these steps, youll be well on your way to achieving a beautiful, newly painted fence that is sure to add a touch of color and style to your yard.
Applying the First Coat of Paint

Painting a fence can be a great way to spruce up your outdoor space and give it a fresh and vibrant look.
After youve gotten the necessary tools and supplies, its time to get started.
The first step is to apply a coat of primer, which will help the paint adhere better and will also protect the wood from moisture and weathering.
To do this, use a brush or roller and evenly spread the primer across the fence.
Once its finished, allow it to dry completely before moving on to the next step.
Once the primer has dried, its time to apply the first coat of paint.
To do this, use a brush or roller and start at the top of the fence, working your way down in even strokes.
If youre using a brush, make sure to apply the paint in one direction with the grain of the wood and avoid going back and forth.
When the paint starts to dry, use a roller to even out any brush strokes and create a smooth finish.
Once the first coat is complete, allow it to dry completely before moving on to the next step.
Applying the Second Coat of Paint
Once the first coat of paint has dried, its time to apply the second coat.
When painting a fence, its important to make sure that each coat is given enough time to dry.
This will ensure that the paint adheres properly and lasts longer.
To apply the second coat of paint, start by stirring the paint well.
Then, use a roller and apply the paint in even strokes across the fence.
Starting at the top, roll the paint downward in even lines.
This will help ensure an even finish.
To ensure that no paint is missed, be sure to paint the sides of the fence as well.
Allow the second coat to dry for at least two hours before continuing.
Finishing the Fence with a Roller

Once youve completed the painting process, the last step is to finish the fence with a roller.
Using a roller is the best way to ensure a smooth and even finish.
It also reduces the amount of time needed to paint the fence, as well as avoiding any potential streaking or unevenness.
Before beginning, make sure you have the right roller for the job.
A long-nap roller will work best for fences that have a rough or uneven surface, while a short-nap roller will work better for a smoother fence.
Be sure to check the instructions on the paint can for the recommended roller size.
Once youve selected the right roller, its time to begin.
Start by dipping the roller into the paint tray and then roll it over the fence in a sweeping motion.
For the best results, roll from one end of the fence to the other in one continuous line.
Be sure to apply even pressure and keep the roller moving.
This will help prevent any streaks or smudges.
When youve finished the first coat, allow it to dry and then repeat the process for the second coat.
You may need to use a brush to touch up any areas that were missed with the roller.
Finally, use a clean cloth or brush to remove any paint splatters or drips.
By following these steps, youll have a beautiful, newly painted fence in no time! With the right tools and a bit of patience, painting a fence is a great way to upgrade your outdoor space and add a little color to your yard.
Caring for the Newly Painted Fence
Once your fence has been painted, you will want to keep it looking its best for years to come. Proper care and maintenance of your fence is essential to ensure a long-lasting finish. Here are some tips to keep your fence in great shape:
1. Regularly inspect your fence for any damage or signs of wear and tear. Pay attention to any scratches, dents, or fading paint that could be caused by the elements or pests.
2. Clean your fence regularly using a mild detergent and water to remove dirt and debris. Avoid using high pressure washers as this could damage the paint.
3. If you notice any chips or scratches in the paint, you can touch them up with a matching paint. This will help to maintain the original look of your fence.
4. To protect your fence from the elements, consider applying a sealant or water-repellant coating. This will help to prevent fading, cracking, and weathering.
Following these tips will help to keep your fence looking great for years to come.
With proper care and maintenance, your newly painted fence will stay looking beautiful and add a touch of color to your outdoor space.
Final Thoughts
Painting a fence may seem daunting, but with the right tools and the right instructions, it can be an easy and rewarding task! By following the steps outlined in this guide, you’ll be able to upgrade your outdoor space in no time, and enjoy your freshly painted fence for years to come.
Now that you know how to paint a fence, why not get started on your project today?