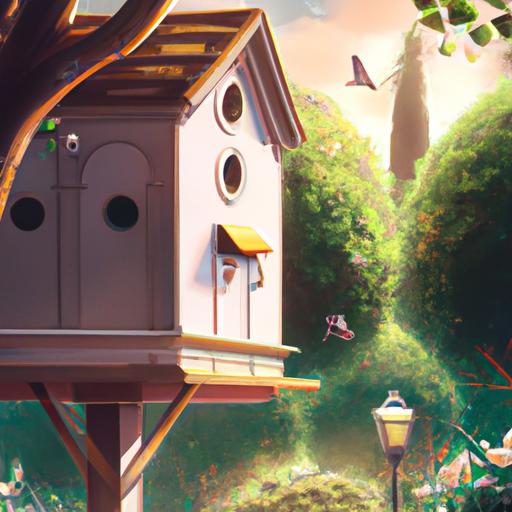
Have you ever wanted to create a special home for our feathered friends? The dream of building a beautiful and functional birdhouse can easily become a reality with the right tips and tricks! In this article, well uncover the secrets to making a good birdhouse.
From choosing the right materials and measuring and cutting wood, to adding a lid or roof and painting or staining the birdhouse, youll be able to build a birdhouse thats both aesthetically pleasing and effective in providing a safe place for birds to nest.
So, if youre ready to get started, lets dive right in and explore the tips and tricks for creating a great birdhouse!
Short Answer
To make a good birdhouse, you’ll need to choose a design that suits the type of bird you want to attract.
Make sure the birdhouse has a roof that will protect the birds from the elements, and a hole that is the right size for the species of bird you’re hoping to attract.
You should also consider adding a perch or ledge near the entrance to give the birds a place to rest.
Lastly, make sure to clean the birdhouse out at least once a year to keep the birds healthy.
Choosing the Right Materials
When it comes to making a good birdhouse, the materials you use are just as important as the construction process.
Plywood is a popular choice as it is strong, lightweight and relatively easy to work with.
Cedar and pine are also great options, as they are both durable and resistant to rot and insects.
Its important to select wood that is free of knots and other imperfections, as these can cause the birdhouse to be structurally weak.
It is also wise to use pressure-treated wood that has been treated with preservatives to protect it from the elements.
When it comes to screws and nails, use galvanized screws to ensure they wont rust over time.
Make sure to use the appropriate size screws and nails for the job, as this will help keep the birdhouse sturdy.
Finally, consider adding a waterproof sealant to the exterior of the birdhouse to protect it from the elements.
Measuring and Cutting the Wood

When it comes to building a birdhouse, one of the most important steps is measuring and cutting the wood.
To ensure that your birdhouse is structurally sound and provides adequate space for your feathered friends, you will need to take precise measurements and cut the wood accurately.
The best way to do this is to begin by measuring the width and length of the wood you plan to use.
Depending on the size of the birdhouse you are planning to make, you may need to use a ruler or tape measure to ensure accurate measurements.
Once you have the measurements, you can mark the wood with a pencil, then cut it to size.
For best results, use a saw or jigsaw, making sure to keep your cuts straight and precise.
Once all the pieces are cut, you can begin assembling the birdhouse.
Securing the Boards
Securing the boards is an important step when making a birdhouse.
Depending on the type of wood you are using, the best approach will vary.
For plywood or other sheet materials, the best way to secure the boards is with screws or nails.
Nails are easier to drive and can provide a more secure hold, but screws are a better option for keeping the boards together in the long run.
Make sure to use screws that are long enough to penetrate through the boards and into the frame, but not so long that they come out the other side.
If you’re using cedar or pine, you can use dowels and glue to add an extra layer of strength and durability.
Make sure to use a glue that is designed for outdoor use, so that it won’t break down over time.
Once the boards are securely in place, you can move onto the next step.
Adding a Lid or Roof

Once the sides of your birdhouse are securely in place, its time to add a lid or roof.
This will provide protection from the elements and keep the birds safe.
Depending on the type of birdhouse youre making, you may need to use different materials.
If youre making a nesting box, use plywood or cedar.
For a more decorative birdhouse, use shingles.
When attaching the lid or roof, use nails or screws and make sure theyre long enough to penetrate the wood and hold the material securely in place.
If youre using shingles, use a construction adhesive or roofing nails to keep them in place.
If you want to make the birdhouse easier to clean, consider adding a hinged lid.
This will allow you to open the birdhouse for cleaning and maintenance.
To attach the hinges, drill small pilot holes in each side of the birdhouse and then attach the hinges with screws.
Make sure the hinges are sturdy and secure, as a loose hinge can cause the birdhouse to collapse.
Once the lid or roof is in place, your birdhouse is ready for the finishing touches.
Before you paint it, make sure all the nails and screws are firmly in place.
You can also add a perch to the birdhouse, which will make it easier for birds to enter and exit.
Painting or Staining the Birdhouse
When it comes to the finishing touches on your birdhouse, painting or staining is the way to go.
Not only does a fresh coat of paint or stain make your birdhouse look great, but it also helps protect the wood from the elements and keeps it in good condition.
When selecting a paint or stain, make sure you choose a product that is specifically designed for outdoor use.
This will ensure that your birdhouse is protected from the sun, rain, and other elements.
Additionally, if youre using paint, make sure it is lead-free and non-toxic.
When it comes to staining your birdhouse, you have several options.
A traditional oil-based stain is one of the most popular, as it provides a rich color and is easy to apply.
If you want a more natural look, you can also opt for a water-based or a solid-color stain.
Once youve selected your paint or stain, its time to apply it.
Start by sanding the wood to remove any rough edges and create a smooth surface.
Then, apply the paint or stain evenly with a brush or roller, making sure to cover all sides of the birdhouse.
Allow the paint or stain to dry completely before attaching it to a pole or tree.
Making a good birdhouse doesnt have to be daunting.
With the right materials, tools, and a little know-how, you can create a perfect home for your feathered friends.
By selecting the right wood, cutting it to size, adding a hinged lid or roof, and painting or staining it, you can create a birdhouse that will be enjoyed by generations of birds.
Attaching the Birdhouse to a Pole or Tree

Once you have cut your boards and secured them together, the next step is to attach the birdhouse to a pole or tree.
This can be done with screws, nails, or even a wire hanger.
To ensure the birdhouse is secure, it is important to use screws or nails that are long enough to penetrate through the wood, and into the pole or tree.
If you are using a wire hanger, make sure it is strong enough to hold the weight of the birdhouse.
Additionally, it is important to secure the birdhouse at a height that is comfortable for the birds to access.
This will vary depending on the type of bird you are trying to attract, but generally speaking, it should be between 4-6 feet off the ground.
Once the birdhouse is securely attached, you can add a hinged lid or roof for easy cleaning.
This is important because it allows you to remove any debris or nesting material without disturbing the birds.
The lid or roof should be attached to the birdhouse with hinges, and should be made of a durable material such as metal or plastic.
Make sure that the hinges are securely attached, as this will help to prevent the lid from opening when the birds are inside.
Finally, you can paint or stain the birdhouse to your desired color and design.
This is an important step, as it will help the birdhouse blend into its surroundings and make it more attractive to the birds.
Additionally, a coat of paint or stain will help to protect the birdhouse from the elements and keep it looking good for years to come.
With these few simple steps, you can easily create a perfect home for your feathered friends.
Whether you are a beginner or an experienced woodworker, making a good birdhouse is a rewarding project that will benefit the birds in your area.
Finishing Touches
When it comes to finishing touches, there are a few key elements to consider.
First, youll want to make sure the birdhouse is waterproof.
To do this, you can apply a coat of waterproof sealant to all the exterior surfaces.
You can also add a weather-resistant roof to protect the birds from the elements.
Additionally, adding small details such as a perch or an entrance hole can make the birdhouse more attractive and inviting.
Finally, you can paint or stain the birdhouse to match your home or garden.
Be sure to use a non-toxic paint or stain to ensure the birds safety.
With these finishing touches, youll have a beautiful and functional birdhouse that will bring birds to your backyard for years to come.
Final Thoughts
Making a birdhouse may seem like a daunting task, but with the right materials, a few tools, and a bit of know-how, you can easily create a perfect home for your feathered friends.
Start by selecting the right wood, then measure and cut your boards, secure them together, and add a lid or roof.
Finish it off with a coat of paint or stain and attach it to a pole or tree, and youll have a beautiful new birdhouse in no time.
So what are you waiting for? Get out there, gather the materials, and start building!