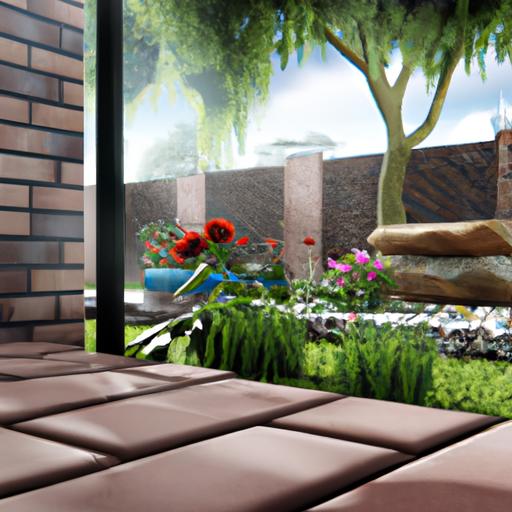
Are you looking for a DIY project that will add the perfect finishing touch to your backyard? Edging a brick patio is a great way to give your outdoor space a polished look that will last for years.
In this article, youll learn the five steps for creating a perfect edge to your brick patio, from what tools youll need to the finishing touches.
So get ready to transform your backyard and start edging!
Table of Contents
Short Answer
To edge a brick patio, you will need to dig a trench for the edging material around the perimeter of the patio.
Make sure to dig the trench deep enough to sit below the level of the patio.
Fill the trench with gravel and then place the edging material on top of the gravel.
Use a rubber mallet to tap the edging material into place.
Finally, fill in the trench with soil and compact it down to make sure the edging material has a secure fit.
What Tools are Needed?
Creating a neat edge around a brick patio can be a great way to add a touch of sophistication to your outdoor living space.
To achieve a perfect finish, youll need the right tools to get the job done.
The essential tools for edging a brick patio include a measuring tape, a spade, and a hammer.
The measuring tape will come in handy when measuring the existing patio and marking the edges of the desired border.
A spade is necessary for digging the shallow trench that will serve as the foundation for the edge.
Finally, a hammer is needed to press the bricks firmly into the ground.
Using the right tools for the job is key to achieving a perfect finish.
If you dont have the right tools, you may need to purchase them from a hardware store or borrow them from a friend.
Having the right tools will make the job easier and help ensure a professional-looking result.
In addition to the essential tools, you may also want to consider a few other items that can make the process easier.
A wheelbarrow, for example, can help transport materials around the patio.
A level can help ensure the bricks are inserted at the right depth.
And a garden hose can help keep the area around the patio damp, which will make it easier to work with the bricks and ensure a secure fit.
With the right tools in hand, youre ready to begin edging the brick patio.
Having the right tools on hand will make the job much easier and help ensure a professional-looking result.
How to Measure and Mark the Edges

Measuring and marking the edges of a brick patio is an important step to take before beginning the edging process.
This will ensure that your finished product is even and symmetrical.
To measure, use a tape measure or string and stake to measure the existing patio or the desired area of the new patio.
Make sure to measure both the length and width so that you can accurately mark your edges.
Once the space has been measured, use a marking paint or spray chalk to mark the edges of your desired border.
This will serve as a guide for when you begin to dig the shallow trench for the edge.
Make sure that the marked edges are straight and even to achieve the best results.
With the edges marked, you’re all set to begin the edging process.
Digging the Foundation
Digging the foundation for edging a brick patio is an important step in achieving a perfect finish.
To begin, youll need to measure the existing patio and mark the edges of your desired border.
Once the edge is marked, its time to break out the spade and dig a shallow trench that will serve as the foundation for the edge.
The depth of the trench should be at least two inches, and it should be slightly wider than the width of the bricks you plan to use.
Depending on the size of the patio, the trench may need to be extended with additional sections to achieve a seamless edge.
Make sure to dig the trench at an angle, as this will make it easier to insert the bricks.
Once the trench is dug, be sure to remove any large rocks, debris, or roots from the soil before moving on to the next step.
Choosing the Right Bricks

When it comes to edging your brick patio, you’ll want to make sure you choose the right bricks for the job.
Depending on the look you’re going for, you may want to opt for a more decorative option, such as tumbled bricks or cobblestones.
If you’re looking for a more traditional look, you could also use standard rectangular bricks.
When selecting your materials, you’ll want to consider the size of the brick, as well as its color and texture.
You’ll also want to make sure the bricks you select are appropriate for the environment you’re working in, as some materials may not be suitable for certain climates.
Additionally, you’ll want to factor in the amount of time and effort you’re willing to invest in the project, as some brick options may require additional care and maintenance.
Once you’ve chosen the right bricks for your project, you’ll be ready to begin edging your brick patio.
Laying the Bricks
Once you have marked the edge of your desired border and dug the shallow trench, its time to start laying the bricks.
The best way to start is to lay a single row of bricks along the marked edge, making sure to press them firmly into the ground.
If the bricks are not level, you can use a rubber mallet to tap them into place.
For a more secure fit, you can fill the trench with a layer of sand or mortar before laying the bricks.
If you are using sand, make sure to pack it firmly around the bricks.
Next, you will need to lay the remaining bricks in parallel rows.
Make sure to stagger the joints between each row and use a spirit level to check for any uneven spots.
You can also use a rubber mallet to tap the bricks into place if needed.
When you reach the end of the patio, you may need to cut the last brick to fit snugly.
For a precise cut, you should use a wet saw and a diamond blade.
Once you have laid the bricks, you can fill the joints with sand.
Use a stiff brush to sweep the sand into the joints and then use a hose to lightly dampen the bricks.
This will help to keep the sand in place and also help to prevent weeds from growing in the joints.
Finally, you should use a sealer to protect the bricks and keep them looking great for years to come.
Once the sealer is applied, your brick patio edge will be complete and you can enjoy your beautiful outdoor living space.
Filling the Trench

Once the trench is dug, its time to fill it with the bricks that will form the edge of your patio.
Start by laying down a bed of sand in the trench.
This will act as a cushion to protect the bricks from shifting and also help to level them out.
Make sure to spread the sand evenly and fill the trench completely.
Once the sand is in place, you can begin to insert the bricks into the trench.
Start at one end of the trench and work your way to the other, ensuring that the bricks are aligned and level.
As you insert each brick, press it firmly into the sand to secure it in place.
Additionally, you can use a rubber mallet to ensure that each brick is fully in place.
To finish, add more sand to fill any gaps between the bricks.
Once the sand is in place, your edge is ready for use!
Finishing Touches
Once the brick edge is finished, its time for the final touches.
Youll want to make sure the edges are nice and even with no gaps or overlaps.
Also, check that the bricks are level with the surface of the patio.
If any bricks are sticking up too high, use a rubber mallet to tap them down.
To fill any gaps between the bricks, you can use a mixture of sand and cement.
The sand will help lock the joints in place and the cement will help keep the brick edge in place.
The last step is to use a sealer to protect the brick edge from the elements.
Choose a sealer specifically designed for brick patios.
This will help protect the brick from water damage and staining.
Make sure to apply the sealer according to the manufacturers instructions.
By following these simple steps, you can easily create a beautiful and durable edge for your brick patio.
With a little bit of effort and the right tools, you can create a sophisticated edge that will add a touch of elegance to your outdoor living space.
Final Thoughts
Creating a perfect edge around a brick patio doesn’t have to be difficult.
With the right tools and a little bit of effort, you can quickly transform your outdoor living space.
Now that you know the steps to edge a brick patio, it’s time to get started! Gather the materials you need, measure the area, and start laying the bricks.
With a few simple steps, you can give your patio a finished, polished look that will last for years to come.